Welcome to A Dark Room, a captivating text-based indie game where simplicity meets depth. This guide will help you navigate its mysterious world, offering insights and strategies to enhance your experience;
1.1 What is A Dark Room?
A Dark Room is a minimalist, text-based indie game developed by Doublespeak Games. Released in 2013, it offers a unique blend of mystery, strategy, and role-playing elements. Players awaken in a dark room and must progress by managing resources, crafting items, and exploring a mysterious world. The game’s simplicity and depth make it highly engaging, with its open-source nature allowing for community-driven enhancements and interpretations.
1.2 Brief History and Release Date
A Dark Room was released on June 13, 2013, by Doublespeak Games. It debuted as a minimalist, open-source text-based game, quickly gaining popularity for its unique blend of mystery and strategy. The game’s simplicity and depth resonated with players, leading to a dedicated community and various interpretations. Its release marked a return to classic text-adventure gameplay, offering a refreshing experience in modern gaming.
1.3 Overview of Gameplay Mechanics
A Dark Room is a text-based game where players begin in a dimly lit room, gradually uncovering the world through exploration. The game emphasizes resource management, crafting, and strategic decision-making. As you progress, the environment evolves, introducing new challenges and puzzles. The minimalist design encourages experimentation, with each action impactful to your journey. The core mechanics revolve around optimizing actions, managing resources, and interacting with the environment to progress through the story. The game’s simplicity belies its depth, rewarding careful planning and patience.
Basic Walkthrough of A Dark Room
Begin in a dimly lit room, find the light source, and explore the surroundings. Gather resources, interact with the environment, and uncover the mysteries step by step.
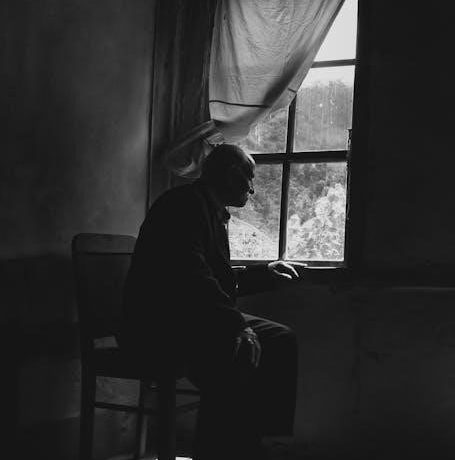
2.1 Starting the Game: The Dark Room
The game begins with you awakening in a pitch-black room. Your goal is to find the light source and understand your surroundings. Tap the screen to interact with objects. Initially, you’ll focus on lighting the fire, which progresses the story. As you explore, you’ll encounter choices that shape your journey. The minimalist interface ensures focus on text-based interactions, immersing you in the mysterious atmosphere. This initial phase sets the tone for the adventure ahead, blending puzzle-solving with strategic planning.
2.2 Exploring the Village and Surroundings
As you progress, you’ll unlock the ability to explore the village and its surroundings. The village serves as a hub for resource gathering and interacting with non-playable characters (NPCs). Scavenge for materials like wood and stone to craft tools. Explore nearby areas such as forests and caves, each offering unique resources and challenges. Managing your inventory efficiently is crucial for survival. Prioritize upgrading your gear and expanding your village to unlock new opportunities for progression and exploration.
2.3 Managing Resources and Crafting
Resource management is vital in A Dark Room. Gather wood, stone, and food to sustain your progress. Crafting tools and upgrades enhances your efficiency, allowing you to explore further and unlock new features. Prioritize upgrading your axe and pickaxe to improve resource collection speeds. Balancing resource gathering with exploration ensures you don’t deplete your supplies prematurely. Regularly check your inventory to avoid waste and plan your crafting strategically. Efficient resource management is key to advancing through the game’s stages smoothly.

Advanced Strategies for A Dark Room
Advanced strategies in A Dark Room involve optimizing resource allocation and mastering strategic planning to enhance gameplay. Discover expert tips to elevate your progress and dominate challenges effectively.
3.1 Speedrunning Tips and Tricks
Mastering speedrunning in A Dark Room requires precise execution and optimized routes. Prioritize weapon upgrades early to maximize efficiency. Focus on resource gathering to unlock key items quickly. Explore the map systematically to avoid wasting time. Utilize shortcuts and exploit game mechanics to shave precious seconds. Practice timing and route memorization to achieve faster completions. Stay alert to minimize errors, as even small mistakes can add up. With dedication, you can significantly reduce your completion time and dominate the game.
3.2 Optimizing Weapon Upgrades
Optimizing weapon upgrades is crucial for progression in A Dark Room. Focus on upgrading your knife and axe first, as they are essential for resource gathering. Allocate resources wisely to avoid wasting materials. Prioritize upgrades that increase damage or gathering speed, as these provide the most immediate benefits. Experiment with different upgrade paths to find what suits your playstyle. Regularly check your weapon stats to ensure they are optimized for the challenges ahead. Efficient upgrades will make exploration and combat significantly easier.
3.3 Solving Puzzles in Different Difficulty Levels
In A Dark Room, puzzles become more complex as difficulty increases. On harder levels, resource management and interactions with NPCs require strategic planning. Experimentation is key, as trial and error often reveal solutions. While guides can provide specific walkthroughs, trusting your instincts and adapting strategies are crucial. As the game progresses, challenges demand a flexible approach to overcome obstacles effectively.
Setting Up a Real-Life Darkroom
Setting up a real-life darkroom is crucial for traditional photo printing. It requires a dedicated space, proper ventilation, and essential tools. Safety and organization are key for efficiency.

4.1 Choosing the Right Space for a Darkroom
Choosing the right space for a darkroom is essential. Opt for a room with minimal natural light, such as a basement or attic. Ensure the space is large enough to accommodate your equipment and allow for comfortable movement. Proper ventilation is crucial to prevent chemical fumes buildup. A room with a water source is ideal, as it simplifies the development process. Consider electrical outlets and safe storage for chemicals. Accessibility and shelving for supplies are also key factors. Use dark curtains or blinds to control light exposure, and ensure walls are non-reflective to maintain optimal conditions.
4.2 Essential Equipment for Darkroom Setup
Setting up a darkroom requires specific equipment to ensure proper photo development. An enlarger is the cornerstone, projecting images onto photo paper. Chemicals like developer, stop bath, and fixer are essential for processing. Trays for each chemical stage are necessary, along with a timer for precise control. A safelight provides illumination without exposing the paper. Gloves and goggles protect against chemicals, while a drying rack or lines are needed for drying prints. Invest in a thermometer and graduated cylinders for accurate mixing. Proper ventilation is also critical to avoid fumes buildup.
4.3 Safety Precautions and Best Practices
When setting up a darkroom, safety is paramount. Always handle chemicals like developer, stop bath, and fixer with gloves and goggles to avoid skin and eye irritation. Ensure proper ventilation to prevent inhaling harmful fumes. Keep a first aid kit nearby and have a spill kit available for emergencies. Follow the manufacturer’s instructions for chemical mixing and disposal. Never work in the darkroom alone, and keep the area clean to avoid accidents. Regularly inspect equipment for damage or wear.
Printing Photos in a Darkroom
Printing photos in a darkroom involves transforming digital or film negatives into physical prints using enlargers, chemicals, and precise techniques to achieve desired visual effects.
5.1 Developing Film in the Darkroom
Developing film in a darkroom requires precision and care. Start by loading film onto reels in complete darkness. Mix developer, stop bath, and fixer chemicals according to instructions. agitate the tank gently at intervals to ensure even development. Monitor timing closely, as overdevelopment can ruin the film. After processing, rinse thoroughly and dry. Proper temperature control and safety precautions are essential for achieving optimal results and ensuring the longevity of your photographs. This step is crucial for transforming latent images into visible negatives.
5.2 Printing Techniques for Black and White Photos
Printing black and white photos involves exposing enlarged negatives onto photo paper. Use an enlarger to project images, adjusting focus for clarity. Experiment with contrast filters (e.g., grade 2 or 3) for tone control. Develop paper in a series of chemical baths: developer, stop bath, fixer, and wash. Use dodging and burning techniques to adjust exposure in specific areas. Safelights prevent overexposure. Proper timing and temperature ensure optimal results. Practice and patience refine your skills in creating stunning black and white prints.
5.3 Common Mistakes to Avoid
When printing in the darkroom, avoid common mistakes like overexposing negatives or underdeveloping paper. Ensure safelights are properly filtered to prevent fogging. Maintain consistent chemical temperatures and timings. Inadequate washing can leave residual chemicals, harming prints. Avoid touching photo paper surfaces to prevent fingerprints. Use tongs or gloves for handling. Incorrect focus during enlargement can blur images. Test techniques on scrap paper before final prints. Proper ventilation is essential to avoid inhaling hazardous fumes. Consistency in methods ensures high-quality, professional-looking results.
Additional Tips for Mastering the Darkroom
Mastering the darkroom requires attention to lighting, workspace organization, and chemical handling. Avoid overexposure, ensure consistent temperatures, and regularly clean equipment to maintain quality prints and safety standards.
6.1 Understanding Lighting and Exposure
Lighting and exposure are critical in a darkroom. Safelights with red or amber filters prevent overexposure of photosensitive materials. Use test strips to determine correct exposure times. Adjust enlarger height and aperture for precise control. Proper ventilation ensures chemical stability. Maintain consistent temperatures to achieve uniform development. Regularly clean and inspect equipment to prevent light leaks. Practice with scrap paper to refine techniques. Understanding these fundamentals enhances print quality and consistency in your darkroom workflow.
6.2 Organizing Your Darkroom Workspace
A well-organized darkroom is essential for efficient and safe photo printing. Designate a clean, dry area for your workspace, ensuring proper ventilation. Use a sturdy, chemical-resistant work surface and store supplies like film, paper, and chemicals in labeled containers. Keep frequently used items accessible while securing hazardous materials out of reach. Install shelves or shelve space for enlargers and equipment. A waste bin for disposable items and a clock for timing exposures are also helpful. Regularly clean and maintain your workspace to prevent contamination and ensure smooth operations.
7.1 Final Thoughts on A Dark Room Guide
A Dark Room is a game that masterfully blends mystery, strategy, and simplicity. Its minimalist design hides a world of depth, making it a must-play for fans of text-based adventures. Whether you’re speedrunning or exploring at your own pace, the game offers a unique experience. The active community and abundance of guides ensure you’ll never feel lost. Embrace the journey, optimize your strategies, and uncover the secrets hidden in the darkness. Your adventure awaits!